
Introduction
The start of this guide may look familiar if you’ve read the Xbox version. If so, skip ahead.
Initially, this project was for the Xbox, specifically for Halo 2. By the time you read this, you’re probably going to ask “Who the hell still makes hacks for Halo 2”? This project was started about two years ago, and the first original post on the Xbox-scene forums was done Oct 7 2006, 01:19 AM. However, as the project grew, I realized the potentials of making this for PC gaming.
The route I took is a tad overcomplicated, but I already had the xbox version completed and decided to use it as a base. I personally have not tried this, however if you have an Xbox version of the dance pad, you most likely do NOT need to rip apart and modify the controller. Click here to see how to create an Xbox to USB converter cable. Now, test out your pad using XBCD. If ANY buttons are recognized, then your all set, and you can skip strait to the Wiimote portion of this.
Requirements
- A computer (This guide is windows based)
- Bluetooth
- A Wiimote with Nunchuck
- 2, or 4 IR LED’s, or a portable Wii Sensor Bar
Optional: (Read the intro to see if you can skip this, or if you don’t want the DDR portion)
- An Male USB cord
- An Xbox Controller
- Soldering Iron
Procedure
Over the years, video games have changed dramatically. No longer do we look at games with simple 8 bit graphics such as pong, now we both have and expect video games with realistic environments. However, the same cannot be said for the controller. While systems such as the Wii have revolutionized gameplay inputs, the norm is still the simple controller. When I started my initial research into this project, controlling a game the way a Wii does was unheard of. That being said, I wanted to create a way to interact with games using my full body, and thus, VG Interactive was born. I originally had this idea after looking atlukeoock459’s VR mod. While the pictures may be long gone, but basically he took an Xbox controller, desoldered the control stick, wired the stick upside down to a pair of goggles, and added a weight to the stick. If he looked up, the weight pulled the stick down, and it was the same for left, right, and down.

I wanted to take his idea, and make it better, so that’s where my idea came from. Originally, this was going to be for the Xbox version of Halo 2, however I ultimately decided against it after realizing the potential of using a computer. I did however stick with the Xbox controller, since the Xbox controller can simply be converted to a USB device, and had pre-existing drivers to use. I ended up using D pad on the controller, and the reason I chose the D-Pad to solder to is due to the fact that the D-Pad has four digital inputs (Four switches that when the button is pushed down, the switch activates), while the thumbstick is an analog input. Instead of having to create a converter, its simpler just to simply extend the wires to the dance pad, since the dance pad works in a similar function. This also allows for the user to grab the stick and move it if they feel the need to, they aren’t limited to a controller.
Before we begin, I’m going to put a really crappy diagram overview up for reference:


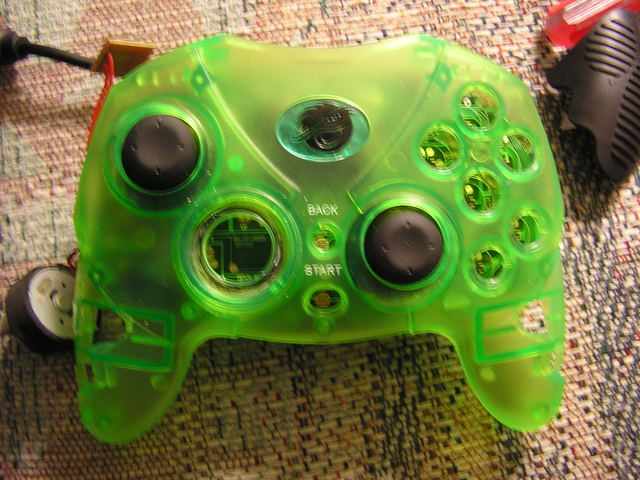
To begin, you need a couple of items; the Controller and DDR Pad.

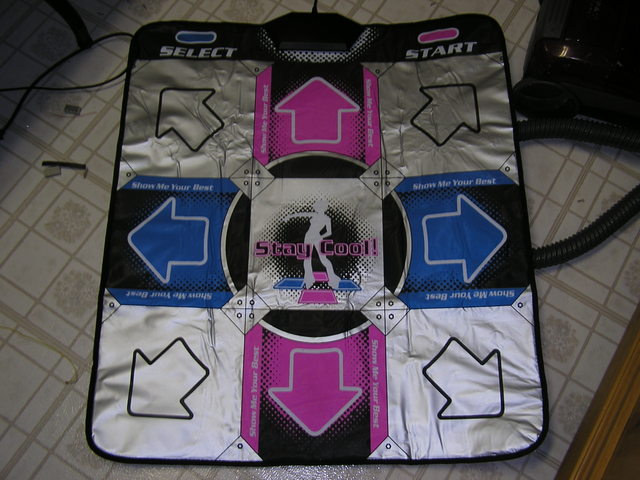
Start by unscrewing the “control box” at the top of the DDR Pad. This is the black plastic case that is at the top of the pad, where the wires come from. When unscrewed, you should see a PCB board.

Flip over the dancepad so you’re looking at the back of the board, where you’ll see a foam “bar” holding the flexible dance pad contacts in place to the board. Pull the board off, leaving the contacts still attached to bar, and the PCB board separate. In the pictures below, you’ll see I didn’t do this step, however these pictures were taken way before my final prototype, so make sure you leave the foam connected to the flexible contacts. When you have the PCB board connected to the wire separated, cut the wire as close to the board as possible, since we will use it later. At this point, you can ditch the board, you’ll never need it again.


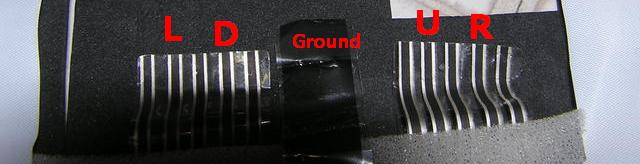
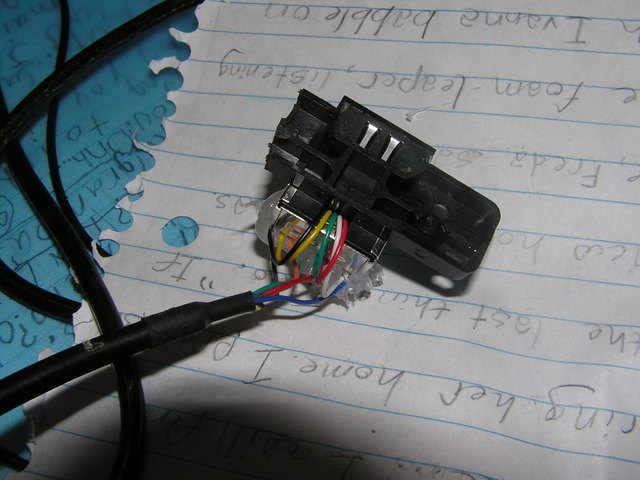
Now, the last image above is what I found to be the “flexible contacts” to each direction to the pad. Up is U, Down is D, ect. While the contacts may not be the same on yours, you can find it out by some simple testing. When you step on left for example, your simply connecting the ground to the L wire, so if you attach an LED to a battery and the ground of the LED to the L (with the battery ground connected to the Pad’s ground), if you step on left, it should light up. Do some testing before you do the next step. The reason we saved the Xbox cord in the last step can also be explained in the last picture. The Xbox cord has 5 wires, so when we connect the Dance Pad to the controller, L, D, U, and R can be connected to separate wires, while the ground is connected to the fifth. Now that we have the contacts identified, we need some way of connecting a wire to each of them. I actually ended up wasting three different dance pads testing different solutions such as conductive glue, and trying to attach tin foil to them to extend them. I finally found the perfect solution, alligator clips. If you get small ones, they can even fit inside the black case that you originally unscrewed. I ended up attaching a clip to each of the 5 wires from the original cord we saved. In my case, I did the following: Black = Ground Red = Up White = Right Green = Down Yellow = Left


The picture above is actually from my conductive glue test, but you should be able to get an idea of what I mean from it. I would attach those clips to each of the contacts, and solder a wire on. When done, I put the original black case over it (You may need to take out the saw and cut some of the inside of the black case up, it has “support beams” that may get in the way), and then proceeded to fill it up with hot glue, so the contacts would never move. I’d recommend it, since technically you’ll never need to open it again. However, you may want to wait till everything is done before doing that, if you made a mistake, you’ll be able to fix it.

Now that the pad is done, we need to work on the controller portion. Take your controller, and unscrew it. Take off the front and back part of the case, leaving the bare PCB exposed. Take the case, and remove the D-Pad directional pad. Now put the front back over the PCB to make sure everything lines up.

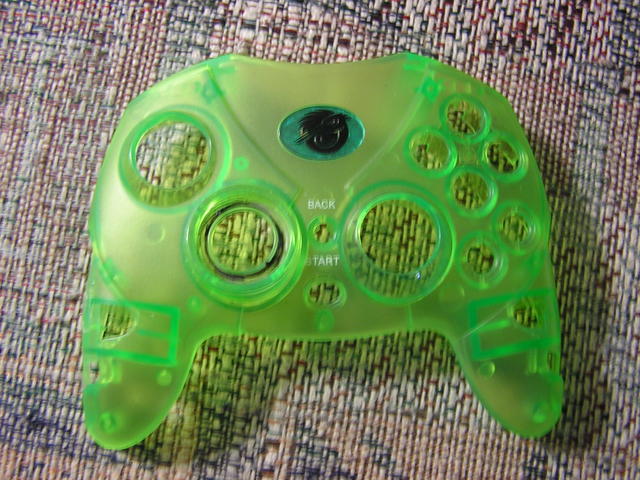
Now, in my case, I had a spare Xbox controller port laying around. I decided that I wanted to solder that to the controller instead of the DDR Pad directly, so I could easily separate them. Though in this guide you’ll see the port being soldered on (the colors remain the same), you can easily directly solder the pad on too.
In the above picture, you can see that I found a common ground on the controller, and then wired up each switch individually. This is most likely going to need to be retested for your controller to see what button does what, so make sure you do that. When your done soldering everything, test out your work of art.


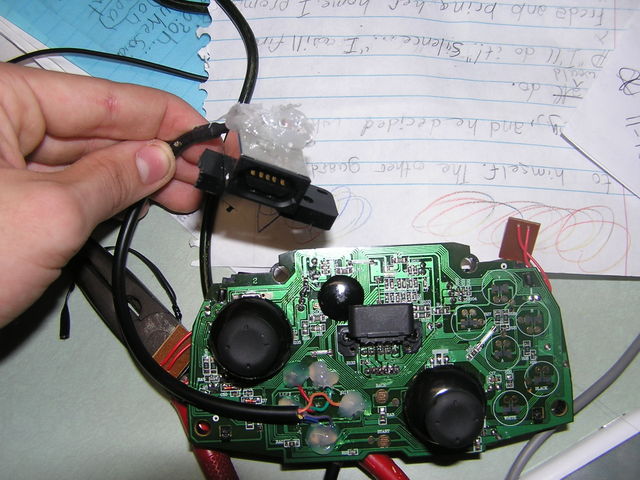
Instead of soldering the dancepad directly to the controller, you can see I attached a port to the Xbox controller so that I can easily detach the pad when needed. The next step in hacking is to put the case back together.


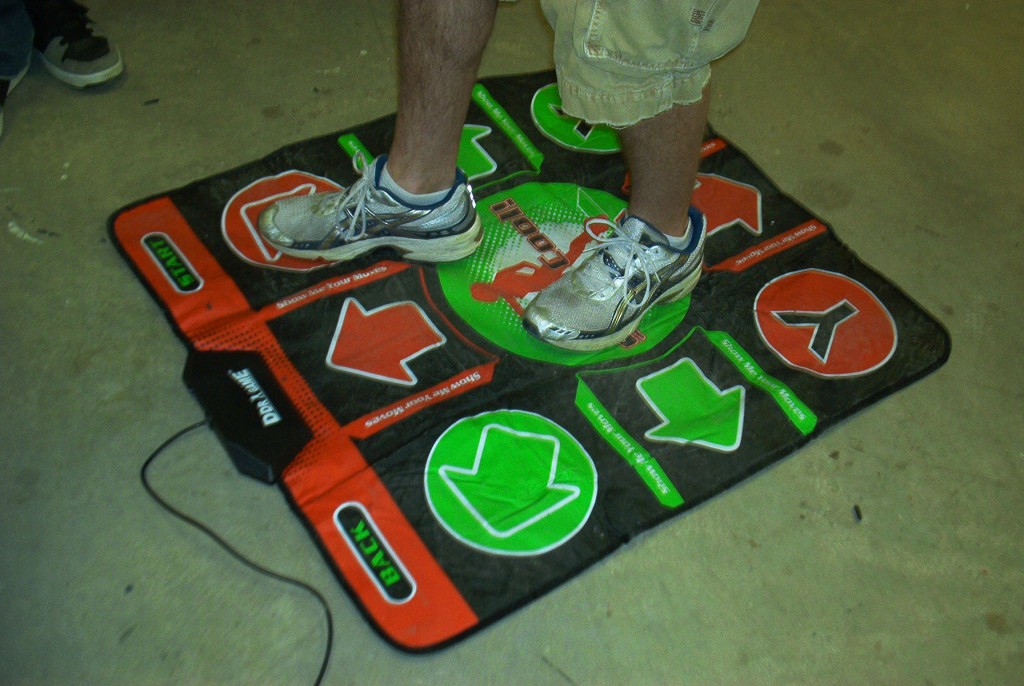
The final step is to install the Xbox drivers, which will also allow you to test your connection. You actually test it on the computer through USB, so follow this guide on making an Xbox to USB cable. After you complete that, before you can plug it into your computer, down load and install XBCD. Make sure when installing that you install the drivers (it should by default). Now load the program, and step on the pad. You should immediately see the directional arrows light up depending on where you step. If everything works perfectly, you are now finished with all the physical hacks.
Two years later
At this point, I put the project on a hold for a good two years. During my senior year of high school, I took a class called Engineering Design and Development. The point of EDD is to pick a problem in the world, and solve it and way you want to. Remembering this project sitting in the back of my closet, I immediately thought of the perfect thesis. “First person shooter games with no physical interaction become boring quickly.” Therefore, an interactive approach would be perfect for this, and I took the old DDR pad out of my closet. I threw everything I had out, and basically created the worklog you see above. In case you get confused when you see the pictures I actually chose to ditch the case of the Xbox Controller, and put it in something that looks a little more professional:


To get back on topic, with the installation of the XBCD drivers, the controller can now be accepted as a gamepad for ANY game, so the only thing left to complete is the Wiimote portion. After obtaining a Bluetooth dongle that works, connect the wiimote as you would any other Bluetooth device. Depending on the software it is different, so just a quick Google on how to connect a wiimote should help. The wiimote has no paring code, so just choose to skip when it asks that. Once the wiimote is connected, download the latest version of WiinRemote and test that everything is working fine. Now, download the vgPC.zip file, extract GlovePie, and install it. Once installed you need to use the specialized script for the Wiimote to work as a controller, which is bundled in the same zip. Open it up in Glovepie, and you can see that it is possible to somewhat configure it. Basically, this program tricks the computer into thinking the Wiimote buttons are actually keyboard buttons, allowing it to work along side the “joystick” dance pad. One very prominent reason I chose this specific script was one of the features it provided: The ability to use what the accelerometer considers “blunt force” as a button. This means anything from punching with the nunchuck in hand to slashing the Wiimote controller as a sword actually registers as a button pressed. There is two total buttons, one in the Wiimote, the other in the Nunchuck. Halo fans will agree that this is particularly fun to use to control the “beatdown”, where he player uses his gun to punch an enemy. The only downside is that when using the wiimote to do this, you will most likely face away from the person attacking, so I recommend assigning it to the Nunchuck. In order to control where we look however, we need to make an IR LED stand.
The Wiimote works in a simple way to detect where it is being aimed. Tilt and roll are calculated through the accelerometer, but the actual direction is detected through the Sensor Bar. The sensor bar works simply, it shines 4 equally spaced IR LED’s at the wiimote, and the wiimote is programmed to only track the 4 brightest things it can see. Nintendo added an IR filter to the front of the remote, so the LED’s are the only things that can shine through. Most people who use the Wiimote on their computers don’t actually have a Wii, so making an LED array, or stand is generally done. I’m not going to get into specifics on how to make it since there are about a million different ways, however through my tests, I’ve decided that two LED’s work better than one. What brought me to my conclusion was while I was playing around in Wiinremote, I noticed that when two LEDS were next to each other at a distance, the Wiimote decides where the center point is. This is useful, because if one LED moves too far out of angle, the Wiimote uses the remaining LED to still position where the dot hypothetically would be, allowing [me] when playing, to view at more of an angle. Also, when using a projector, I recommend making a stand on a tripod or other such device, so you can move it to the desired height. Otherwise, I’d just make a bar that goes over the screen. Click here to check out a LED stands/arrays, or just Google some. I’ll post some pics of a couple I made, the furthers left being oldest, to furthest right being newest:


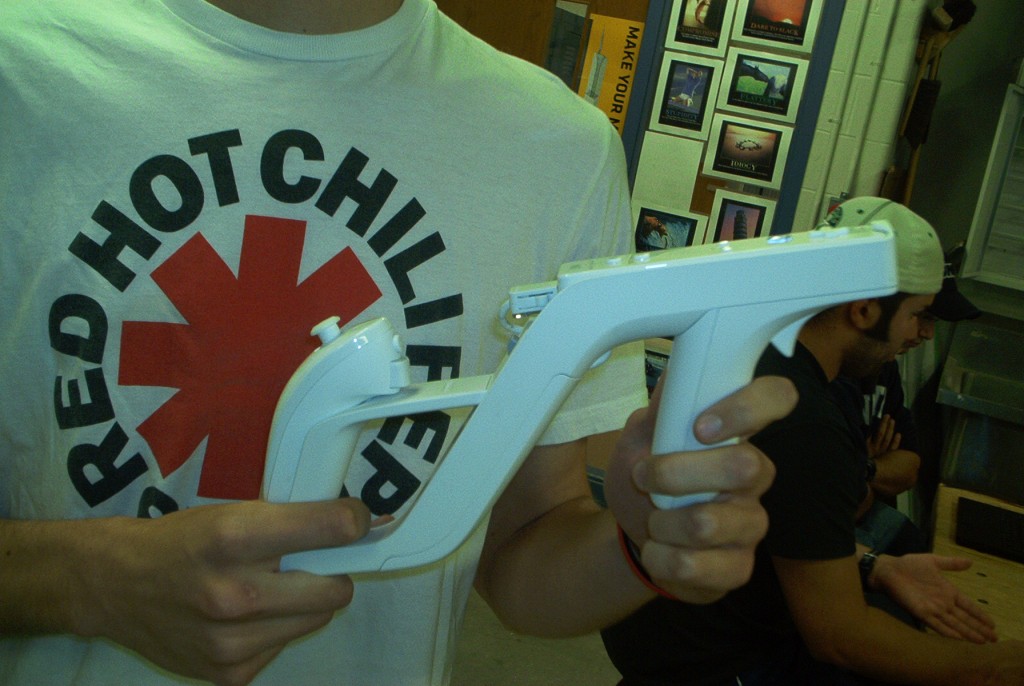
Now finally your ready to test. Plug in the DDR pad, and load up Glovepie with the FPS Ultimate Script. Load the game you want to play, either it be Half-Life 2, Halo 2, or even Call of Duty, and go to the controls menu. Configure it however you want, it is your game after all, just don’t forget to configure the “XBCD Gamepad” as the game will call it, to control walking movement. The controls may be a little jumpy at first, but you’ll naturally adjust over time. Also, Nintendo created something that works perfectly with this project, or you could just make your own:


Conclusion
The final product is something that, while cool, can be made 100% simpler with current technology. vgInteractive was started in order to play video games in a fully interactive way, and this is just one further step towards that goal.
Leave a Reply