
Introduction
Before I begin, I’d like to quoting an email I received from a reader:
“I went into Toshiba Assist->Optimize->Toshiba Button Support, but I noticed that there was nothing in the drop-down menu for setting my buttons from within that window. So I went ahead and clicked each of my Media Control Buttons, and then a pop-up appeared that helped me set WHAT those buttons did. It didn’t help me set up what PROGRAM those buttons open, but then that’s when you can do one of two things. You can either use the Toshiba Button Support software to configure what each button does (though I have to admit it’s kind of confusing, since the labels are ambiguous), or use your tutorial. I personally found your tutorial on manipulating the registry values to be much more straightforward, but I guess to each his own.”
Note: If you chose not to install Toshiba Assist (as I did), then this registry hack seems to be the only way to change the program that opens.
Requirements
- Obviously, a Toshiba Satellite laptop (other models may work)
- A Windows OS (I used 7 at the time of this guide, hopefully newer models work similarly)
Procedure
As I stated above, by default, my laptop would try to open Powercinema when the media key was pressed. Even after uninstalling the program, the laptop would try to open it, so the button remained unused. Following my instructions, you can change the button to open any program, based on what media is in the CD/DVD drive at the time.
Before starting, make sure that the buttons currently work. If you upgraded to Windows 7 or the buttons arent working, download the newest version of the “Toshiba Value Added Package”. My hotkeys didn’t work in Windows 7 (even though they did in Vista) until I did this.
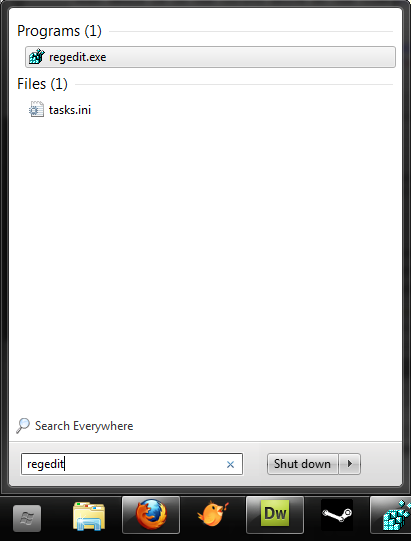
Now, the first step is to run regedit. This can be done in Vista and 7 by opening the start menu and typing “regedit” without the quotes, followed by hitting enter. If that doesn’t work, first hit run, then type it there.
When the window opens, navigate to “HKEY_LOCAL_MACHINE\SOFTWARE\Toshiba\TBS\DefaultSetting\CDDVD”.
It should look like the following image:
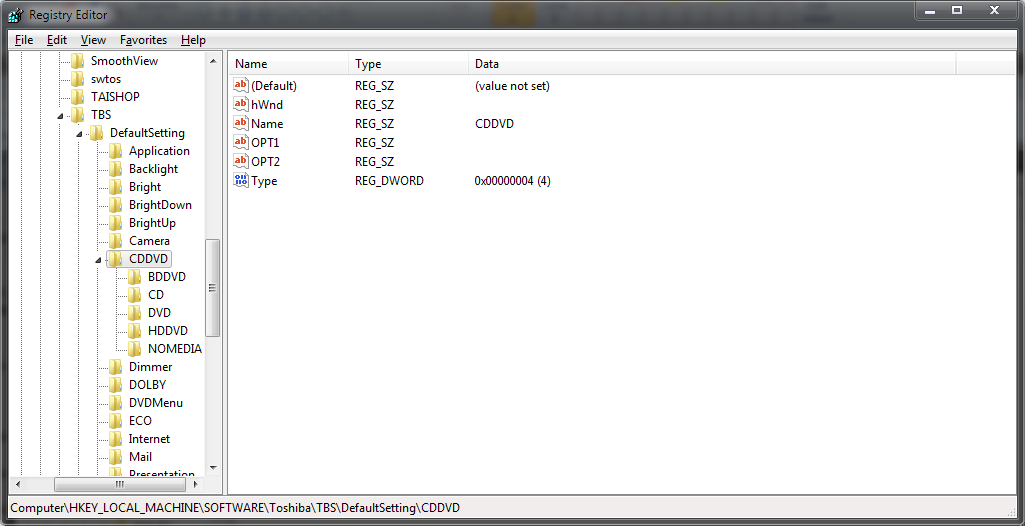
It should be noted that the TBS folder will either not exist, or be empty if he “Toshiba Value Added Package” is not installed! Now, as you can see, the subdirectories are basically the different options the hotkey has to open based on what is in the drive. If a CD is in the drive, then it would open a program specified in the CD folder. The same goes for DVD, and the other options. For my tutorial, I’ll change the NOMEDIA option, which is what it uses when there is nothing in the CD/DVD drive. Click on the folder you want to change, and you will see something similar to the following image:

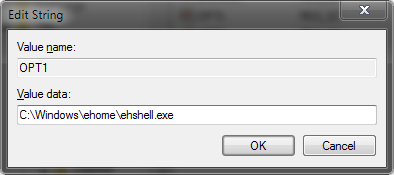
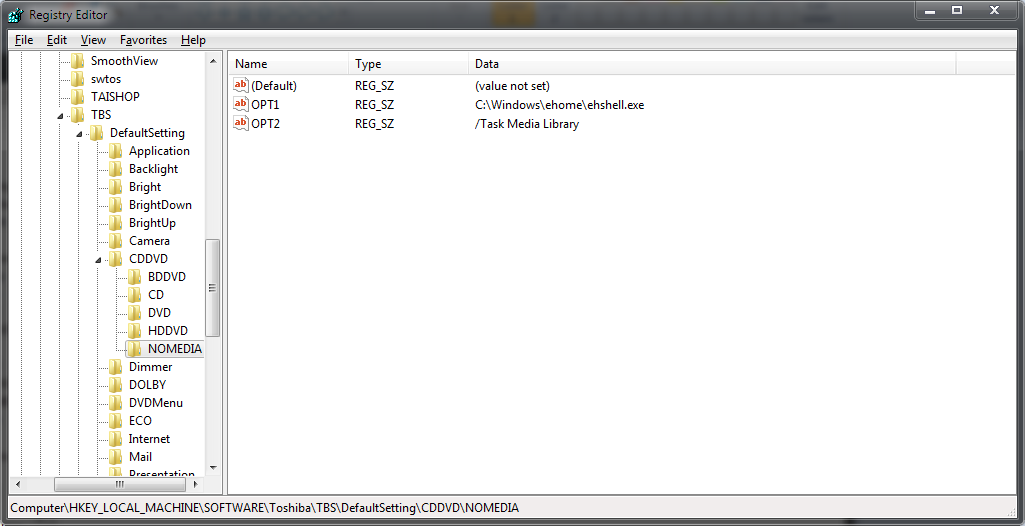
Before continuing further, I highly reccomend that whenever you change a string from this point on, save the original info in a text document, in case you need to revert back. Now, see the string labeled “OPT1”? When the button is hit, it searches for the program specified in OPT1. I don’t use powercinema, so how about we change the string to open Windows Media Center when nothing is in the drive. Double click OPT1, and change the program in “Value Data” to “C:\Windows\ehome\ehshell.exe”, which is the path to Windows Media Center. It should be noted that this is the point where you can choose your own program to open. If I were changing the CD option, I would want something like iTunes or Songbird to open. For some reason, putting the full path for programs installed is not necessary. I tested this with songbird, and simply putting “Songbird.exe” was enough for it to find songbird, and open it. If it doesn’t work for you, the full path should definitely work. The following images show when I set the default to Windows Media Center, and the confirmation after.
Conclusion
Test the new setting by hitting the media button, and you should see your program open! Close out of regedit, and enjoy the freedom from Toshiba’s default values!
Leave a Reply